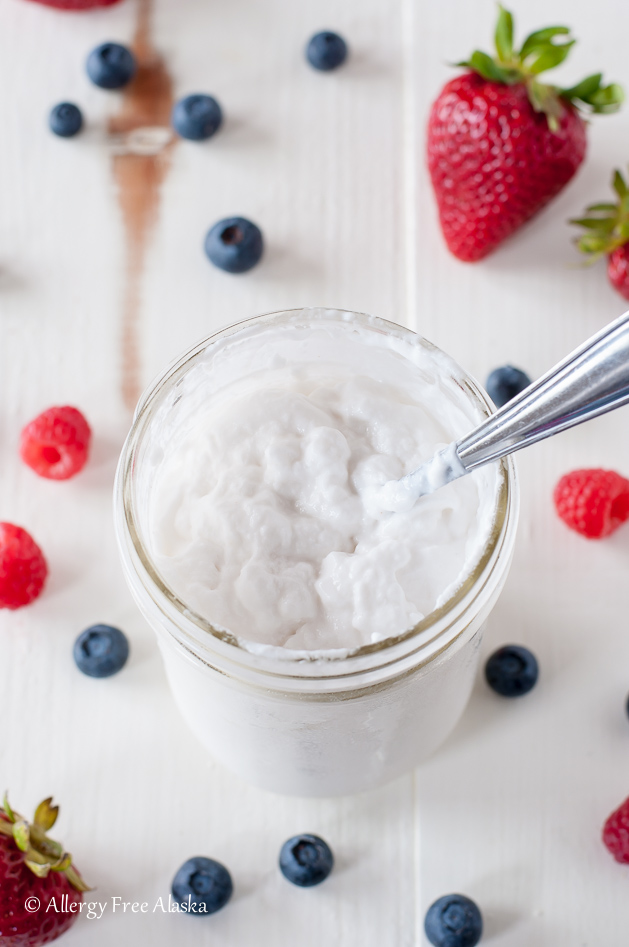
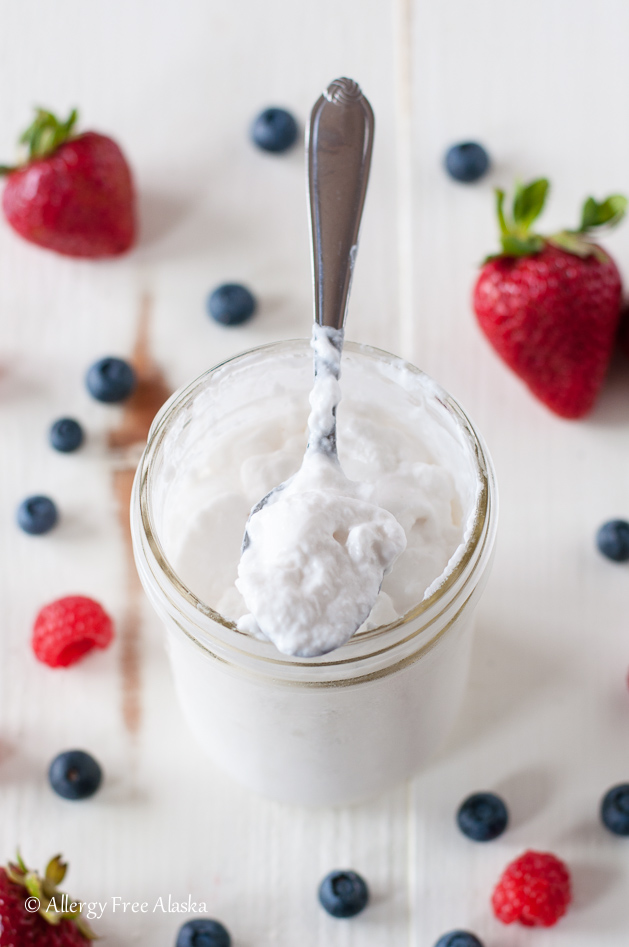
This Instant Pot Coconut Yogurt is a perfect dairy-free alternative for those who can't have cow's milk. It's smooth and tangy, yet you control the sweetness added. This is a simple recipe that can be enjoyed in a myriad of ways!
I am pleased to post this Instant Pot coconut milk yogurt recipe! In all of my years of being dairy-free, this is the first time I've successfully been able to make dairy-free yogurt. And it's SO easy! A lot easier than I ever thought it would be.
It's a wonderful gluten-free dairy-free breakfast option, just like gluten-free quiche, gluten-free scones, and gluten-free pancakes.
That said, there are a few tips and things we need to chat about before you dive in headfirst straight to the coconut yogurt recipe.
Use a High-Quality Canned Coconut Milk
To achieve delicious coconut milk yogurt, you must start with good-tasting, high-quality canned coconut milk. I prefer the Aroy-D brand because it's not only preservative and gum free, but it tastes outstanding (if we're honest, I could drink it straight from the can). If you start using canned coconut milk that you don't like the taste of or is gritty in texture (some of the organic brands are), I can assure you, you won't end up liking the result of your yogurt. Quality is key.
Instant Pot Coconut Milk Yogurt thickeners
- Gelatin- Dairy-free yogurt needs a thickener; it doesn't thicken as cow's milk dairy yogurt will, so I call for gelatin in my recipe. If you do not use a thickener, the yogurt will still taste delicious; it will be more of a kefir-like (runny) consistency.
- Chia Seeds- If you can't use gelatin due to allergies or are vegan, you can try an alternative thickener like chia seeds (so it would be like a chia seed pudding but with yogurt). Start by using one tablespoon of chia seeds. Add them after the yogurt has fermented in the Instant Pot. Stir well to distribute the chia seeds throughout the yogurt evenly and refrigerate until thoroughly chilled.
- Agar Powder- I have many readers who cannot have/use gelatin, so I also tested a batch of yogurt using agar powder instead. This batch did not thicken at all. I used a teaspoon of agar powder and added it to the yogurt, while I would typically add gelatin. I wonder if it wasn't enough agar powder or if I was misusing it. I have yet to use agar powder enough to know why it failed, so if any of you can shed some light on that, I would love help figuring it out.
Coconut Milk Substitutions
- Cashew Cream- If you can't have coconuts, cashew cream might be a perfect substitution.
- Coconut Cream- You can try using coconut cream for a thicker consistency.
- Fresh Young Coconuts- If you can access fresh young coconuts, I bet they taste delicious in this recipe.
Do I Need to Sterilize Canned Coconut Milk
You do not need to sterilize canned coconut milk because it was already sterilized before canning.
How To Make Coconut Milk Yogurt In Instant Pot:
- Fill a sterilized pint-sized canning jar with coconut milk.
- Break open the probiotic capsules and carefully stir the contents into the coconut milk.
- Place a lid on the jar to keep out condensation.
- Add 1 cup of water to the Instant Pot bowl, then place the stainless steel rack on the bottom.
- Place the canning jar on the steam rack and lock the Instant Pot lid.
- Incubate for 8-10 hours using your Instant Pot's "Yogurt" setting.
- Remove the canning jar from the Instant Pot and place the yogurt in a blender, along with the gelatin. Blend until smooth.
- Pour yogurt into a clean container with at least 2 cups, and refrigerate for 6-8 hours or until chilled.
Coconut Yogurt Recipe Helpful Tips
Please ensure you use fresh, adequately refrigerated probiotics to maintain their potency.
If you make 2-3 jars of yogurt at one time (which you totally can), you might want to remove the handles from the stainless steel steam rack that came with the Instant Pot (I had my sweet hubby do this for me). Otherwise, the jars will only fit on the rack with the handles in the way.
Always, always use clean, sterilized canning jars. You don't want anything funky growing in your yogurt.
Can I Make Dairy-Free Yogurt Without An Instant Pot
I have not tested any of these ideas.
- Wrap the jar (with coconut milk + probiotics) in a towel, and place the jar in a cold oven. Turn on the oven light, providing enough heat to ferment the yogurt. The exact time needed will vary from 4 hours to possibly overnight.
- Use a yogurt maker.
- If you have a dehydrator with temperature control, set it at about 110-115 degrees (F) and place the jar inside the dehydrator. The exact time needed for the yogurt to ferment could vary between 4 hours to possibly overnight.
- I hesitate to suggest a crock pot, but if you have one with a "WARM" setting, that could possibly work. A crock pot in a "LOW" setting would be too hot and could kill the probiotics instead of encouraging them to ferment.
I hope you enjoy this IP coconut milk yogurt as much as my family does!
xo,
Mēgan
Instant Pot Coconut Yogurt Recipe:

Instant Pot Coconut Yogurt
This easy Instant Pot Coconut Milk Yogurt is a perfect dairy-free alternative for those who can’t have cow’s milk. It’s smooth and tangy, yet you control the sweetness added. This is a simple recipe that can be enjoyed in a myriad of ways!
Ingredients
- 14 ounces Aroy-D Canned Coconut Milk
- 2 probiotic capsules (I use NOW Probiotic-10, they are gluten-free, wheat-free, dairy-free & vegan
- 1 teaspoon gelatin, **OPTIONAL; see post above for vegan substitute ideas
- sweetener to taste (honey, maple syrup, palm sugar, stevia, etc.)
Instructions
- Add the Aroy-D Canned Coconut Milk to a sterilized pint-sized canning jar.
- Break open the probiotic capsules and sprinkle the inside contents on top of the coconut milk; discard the empty capsules. Use the back of a wooden spoon (or another non-reactive material spoon) to push the probiotic clumps up against the side of the jar to break them up and stir them into the coconut milk. There will still be tiny clumps when completed, but this is okay.
- Place a lid on top of the jar without the outer ring to screw it down. This lid only keeps condensation/moisture out of the jar.
- To the bowl of the Instant Pot, add 1 cup of water and then place the stainless steel steam rack (that came with your Instant Pot) inside. Next, plug in the Instant Pot.
- Carefully place the canning jar on the steam rack and lock the Instant Pot lid. Next, you can move the vent to seal.
- Push the "yogurt" button, and adjust the time to 8 to 10 hours (8 hours if you prefer you're yogurt less tart/sour, and 9 to 10 hours if you prefer it more tart/acidic). The Instant Pot will begin counting up to the time programmed (instead of counting down).
- When the Instant Pot is done, it will beep several times. Unplug it, then immediately remove the canning jar. Remove the canning jar lid, and stir the yogurt. If it has separated at all, this is entirely normal. Taste the yogurt. If it's not tart/sour enough, put it back in the Instant Pot for another 1-2 hours (on the yogurt setting).
- To thicken the yogurt, place the still-warm yogurt into a blender, along with the gelatin. Blend until smooth. (If you wait too long and allow the yogurt to cool before blending it with the gelatin, the yogurt will not thicken.)
- Sweeten to taste using preferred sweetener (we like to use local raw honey). Pour the yogurt back into a larger container (the air bubbles from the blender may cause it to expand and overflow if you try putting it back into the pint-sized canning jar) and refrigerate for 6-8 hours or until thoroughly chilled. Check the yogurt 30-60 minutes after placing it in the refrigerator to cool. If it's separated, stir the mixture quickly to blend everything back together (otherwise, it will solidify separated, which you want to avoid if possible).
Notes
I *DO NOT* recommend placing this on the counter to ferment. This recipe needs warm heat to work.
There are so many notes and helpful tips for this yogurt recipe that I couldn't fit them into the recipe card. So please read the post entirely (above) before making this recipe.
You can make 1 jar of this recipe, or up to 3 jars at a time (in the 6 quart Instant Pot, you *might* be able to do 4 jars in the 8 quarts Instant Pot). For clarity, I wrote the recipe for one jar of yogurt.
We are a participant in the Amazon Services LLC Associates Program, an affiliate advertising program designed to provide a means for us to earn fees by linking to Amazon.com and affiliated sites.










Raia Todd says
I can't wait to try this! It looks gorgeously delicious. 🙂
Megan says
Thank you so much, Raia!
Sharon Makarenko says
This looks great! I can't wait to try it!
Megan says
Thanks, Sharon! I hope you love it! 😉
Jen says
Another great recipe using the instant pot! Love how easy this is to make!
Megan says
Thanks, Jen! The IP is definitely one of my favorite appliances!
Kimberly @ The Daring Gourmet says
I've never tried making yogurt with coconut milk, I'll bet it tastes delicious!
Megan says
Thanks, Kimberly! It really is smooth and delicious!
Abeer says
I never thought of using my Instant pot to make yogurt. This is amazing!
Megan says
Thanks Abeer!
Sandi says
This is pure genius...I am just learning basics with my pressure cooker. Can't wait to try this.
Megan says
Thanks, Sandi! I think you'll LOVE your pressure cooker!
Amy @ Little Dairy on the Prairie says
This is so creative! I love that you gave options to make it!
Megan says
Thanks, Amy!
Anna @ Crunchy Creamy Sweet says
IP yogurt is on my list to try! This looks fantastic!
Megan says
Thanks, Anna!
Catalina @ Peas & Peonies says
Never tried to make yogurt from cocnut milk! But this is a great idea!
Megan says
It really is good, Catalina! And a great alternative for those who are dairy-free. 😉
Megan says
OMG This looks so amazing!!! I have got to get an Instant Pot! I love that you can make one jar of yogurt at at time!
Megan says
Hi Megan, Yes! You can make 1 jar, or up to 3 jars at a time. I thought for the sake of ease though, I'd write the recipe for one jar. 😉
Lorene says
Can one jar be made in the instant pot mini.
Megan says
As long as the mini has the yogurt function button, I think so. 😉
Chrystal @ Gluten-Free Palate says
I love how incredibly simple this recipe is. And your photos are stunning!
Megan says
Thank you so much, Chrystal!
Amanda says
These pictures are almost to pretty to eat! I've yet to try yogurt in my Instant Pot, but I'm looking forward to trying this soon!
Megan says
Awe! Thanks, Amanda! xo
Alisa Fleming says
Those instant pots really get around! I still haven't tried one. This yogurt looks amazing thought and I love how beautifully thick and "clean" it appears. I may need to try your formulation in the slow cooker!
Megan says
I use my Instant Pot at least 4-7 times a week (if not more). I actually have 2 of them. LOL. 😉 Such a great appliance for my busy family! Thanks for the compliments, Alisa! I think you would love this yogurt!
LaShae says
I also have two instant pots! Even a 10 quart. My husband loves cooking with them and I’m trying to catch up. He’ll love adding yogurt back to our diet. Thank you so much for the good recipes!
Mēgan says
Absolutely! I hope you both enjoy the yogurt recipe!
Nicole Dawson says
Have you tried thickening it with chia seeds? We have a vegan gelatin that I use at times, to make "jello" but have yet to attempt my own yogurt yet. Looking forward to trying it.
Megan says
Hi Nicole,
Yes, I have! I have some notes regarding chia seeds above. About 1/4 cup of chia seeds will thicken 1 jar. 😉 Thanks!
Lynda Schneider says
This came out good. I have tried other recipes for coconut yogurt which mostly failed. I will absolutely make it again. Thank you!
Megan says
I'm so happy to hear you enjoyed this! Thank you, Lynda!
Christy says
This sounds so great...I'm in Canada and one of my twins is anaphylactic to dairy and eggs so being able to make our own "safe" yogurt seems amazing, Question - is there a difference between canned coconut milk and coconut milk from the shelf stable tetra packs? I'm not sure we have the variety of canned coconut milks that people in the US do, but I will look. Just thinking about what I usually have kicking around, lol. Thank you!!!
Megan says
Hi Christy,
The tetra packs of dairy-free milk you'd find on the shelf in the grocery store (wether it's coconut milk beverage, hemp milk, rice milk, etc.). Those tetra packs of dairy-free milk are a thinner consistency than canned coconut milk and are meant to be drunk like you would a glass of cow's dairy milk, or used on cereal, etc. Canned coconut milk is a thicker consistency (the Aroy-D brand that I recommend is the only "canned" coconut milk that I know that is also sold in a tetra pack). Hopefully I'm not confusing you or misunderstanding your question! If I am, just let me know and I will try to clarify!
Sally says
Can you freeze the yogurt to make "starter" for the next batch, as you can with regular yogurt? I would assume, if so, that it would be best to do so before adding a thickener?
Megan says
That's a great question, Sally. I haven't tried it myself, so I'm not 100% sure, but I would think so? You might have to experiment.
Shelly says
I'm going to embarrass myself but hopefully save others a mess. Make sure your canning jars are cooled unlike canning. When reading how to sterilize a jar it said to keep it hot. Room temperature coconut milk can be still be cool enough to break your jar with a hot jar. It's in the instant pot now and can't wait to try it.
Megan says
OH NO! Oh, Shelly... I'm sorry to hear that happened. Thanks for the heads up and warning.
Sunny says
Mine ended up tasting like yeast instead of yogurt. I wonder if the probiotic capsules I used had the wrong bacteria in them?
Megan says
Hmm... I don't know, Sunny. Were the probiotics fresh? Mine never tastes yeasty. Sounds like something went wrong somewhere along the way. I would eat that yogurt, either, but throw it out. Make sure your jars are sterile before adding the coconut milk to them.
Angie says
Cant wait to try this. But couple of questions. I dont have a yogurt button on my instant pot but still want to use it instead of the other methids you list so what setting would i use (maybe slow cooker?). Also i would prefer not to add the probotics since i already take them would i need to replace them with anything. Im going to make this for my mom and i know she wouldnt want me adding a probotic that she hadnt apprived of first. Thank you.
Megan says
Hi Angie, this recipe will NOT work without the probiotics. That's what "ferments" the yogurt. If you don't use them, you'll just be left with plain coconut milk.
Without the yogurt function on your Instant Pot, I wouldn't try the slow cooker option. It would be too hot and kill off the probiotics. You could try the "keep warm" function, but I haven't tried this myself to know if it will work (and don't know how hot it would get either).
Ginger says
My best guess on the agar powder failure would be that it needs to boil for a few minutes to thicken. Putting it in nearer the end when the yogurt is not boiling would not 'melt ' it.
Megan says
Thanks Ginger!
Somer McCowan says
A tip about agar agar: it needs to be boiled in liquid for about 5 minutes to activate it. Then cool the liquid until it’s the right temperature for probiotics. Proceed as normal. Vegans rejoice!
Megan says
Awesome! Thanks for the tips, Somer!
Celdry says
I tried making this and the yogurt tastes fine, but smells like eggs - really bad. Is that an indication that something went wrong?
Megan says
It shouldn't smell like eggs. There should be a mild yeasty smell. What brand of coconut milk did you use?
Taylor says
I had the same egg like smell! Did you ever find out why?
Judith Brosch says
Can this be made in a large batch in the instant pot bowl instead of jars? My Daughter makes cows milk yogurt that way and it turns out beautifully.
Megan says
I don't recommend making this without the jars. Cows milk is completely different than coconut milk.
Allison says
Do you need canning jars or can I use a cup? Don't have canning jars but I don't want to run out and buy any if I don't have to. We are not trying to make much....it's a snow day (no school)
Megan says
Hi Allison,
I hesitate to tell you to use anything that isn't heat safe, like a canning jar. You could possibly use a pyrex bowl though (a small one) or a glass pyrex measuring cup.
Kristy says
I have always made my coconut yogurt on the stove top by boiling and cooling then incubating in the oven overnight. The two times I tried making coconut and almond milk yogurt directly in the instant pot container, I got mold. I haven’t made my own yogurt in 2 years that’s how turned off I was! I used Real Thai coconut milk in the tetra pack. Only ingredients are coconut and water and it’s thick. I sterilized my jars and utensils and mixed in an expired probiotic capsule plus tablespoon of store bought coconut yogurt, set lids on and set IP for 10 hours. Lots of condensation when I opened pot and it was very runny. Added gelatin and blended and into the fridge. It turned out beautifully! It thickened up nicely, didn’t need any sweetener and has a mild taste. I’ll leave it longer next time to make it more tart. I’m so thankful to have a recipe I don’t need to boil and cook and that contains no tapioca or arrowroot starch!
Mēgan says
Thank you so much for coming back here, Kristy, and giving me your feedback! I'm so happy to hear you enjoyed it!
Suz says
I am 5 hours into it and realized I forgot to add the water...should I abort the mission?
Mēgan says
The water to the Instant Pot bowl? If it's only been 5 hrs, I would open up the jar with the coconut milk/probiotics. If it smells okay, maybe a little yeasty, it might be salvageable. Otherwise, if it smells off, I would discard it and start again.
Gabby says
Hi, how many probiotic capsules should I use, and is it different if I'm using coconut cream vs. coconut milk?
Mēgan says
Hi Gabby,
The amount of probiotic capsules is included in the recipe card above with the directions. Maybe you accidentally scrolled by it? I'd still use the same amount with coconut cream. 😉